Table of contents
Node-RED introduction
Node-Red provides a browser-based editor that makes it easy to wire together flows using the wide range of nodes in the palette that can be deployed to its runtime in a single-click. JavaScript functions can be created within the editor using a rich text editor.
Flow management
Access the editor
With Node-RED running, open the editor in a web browser. If you followed this guide correctly Node-RED’s web interface should be accessible at ip-address:1880.
Creating a flow
This guide includes a brief introduction to Node-RED, it is highly recommended to check out Node-RED’s editors guide.
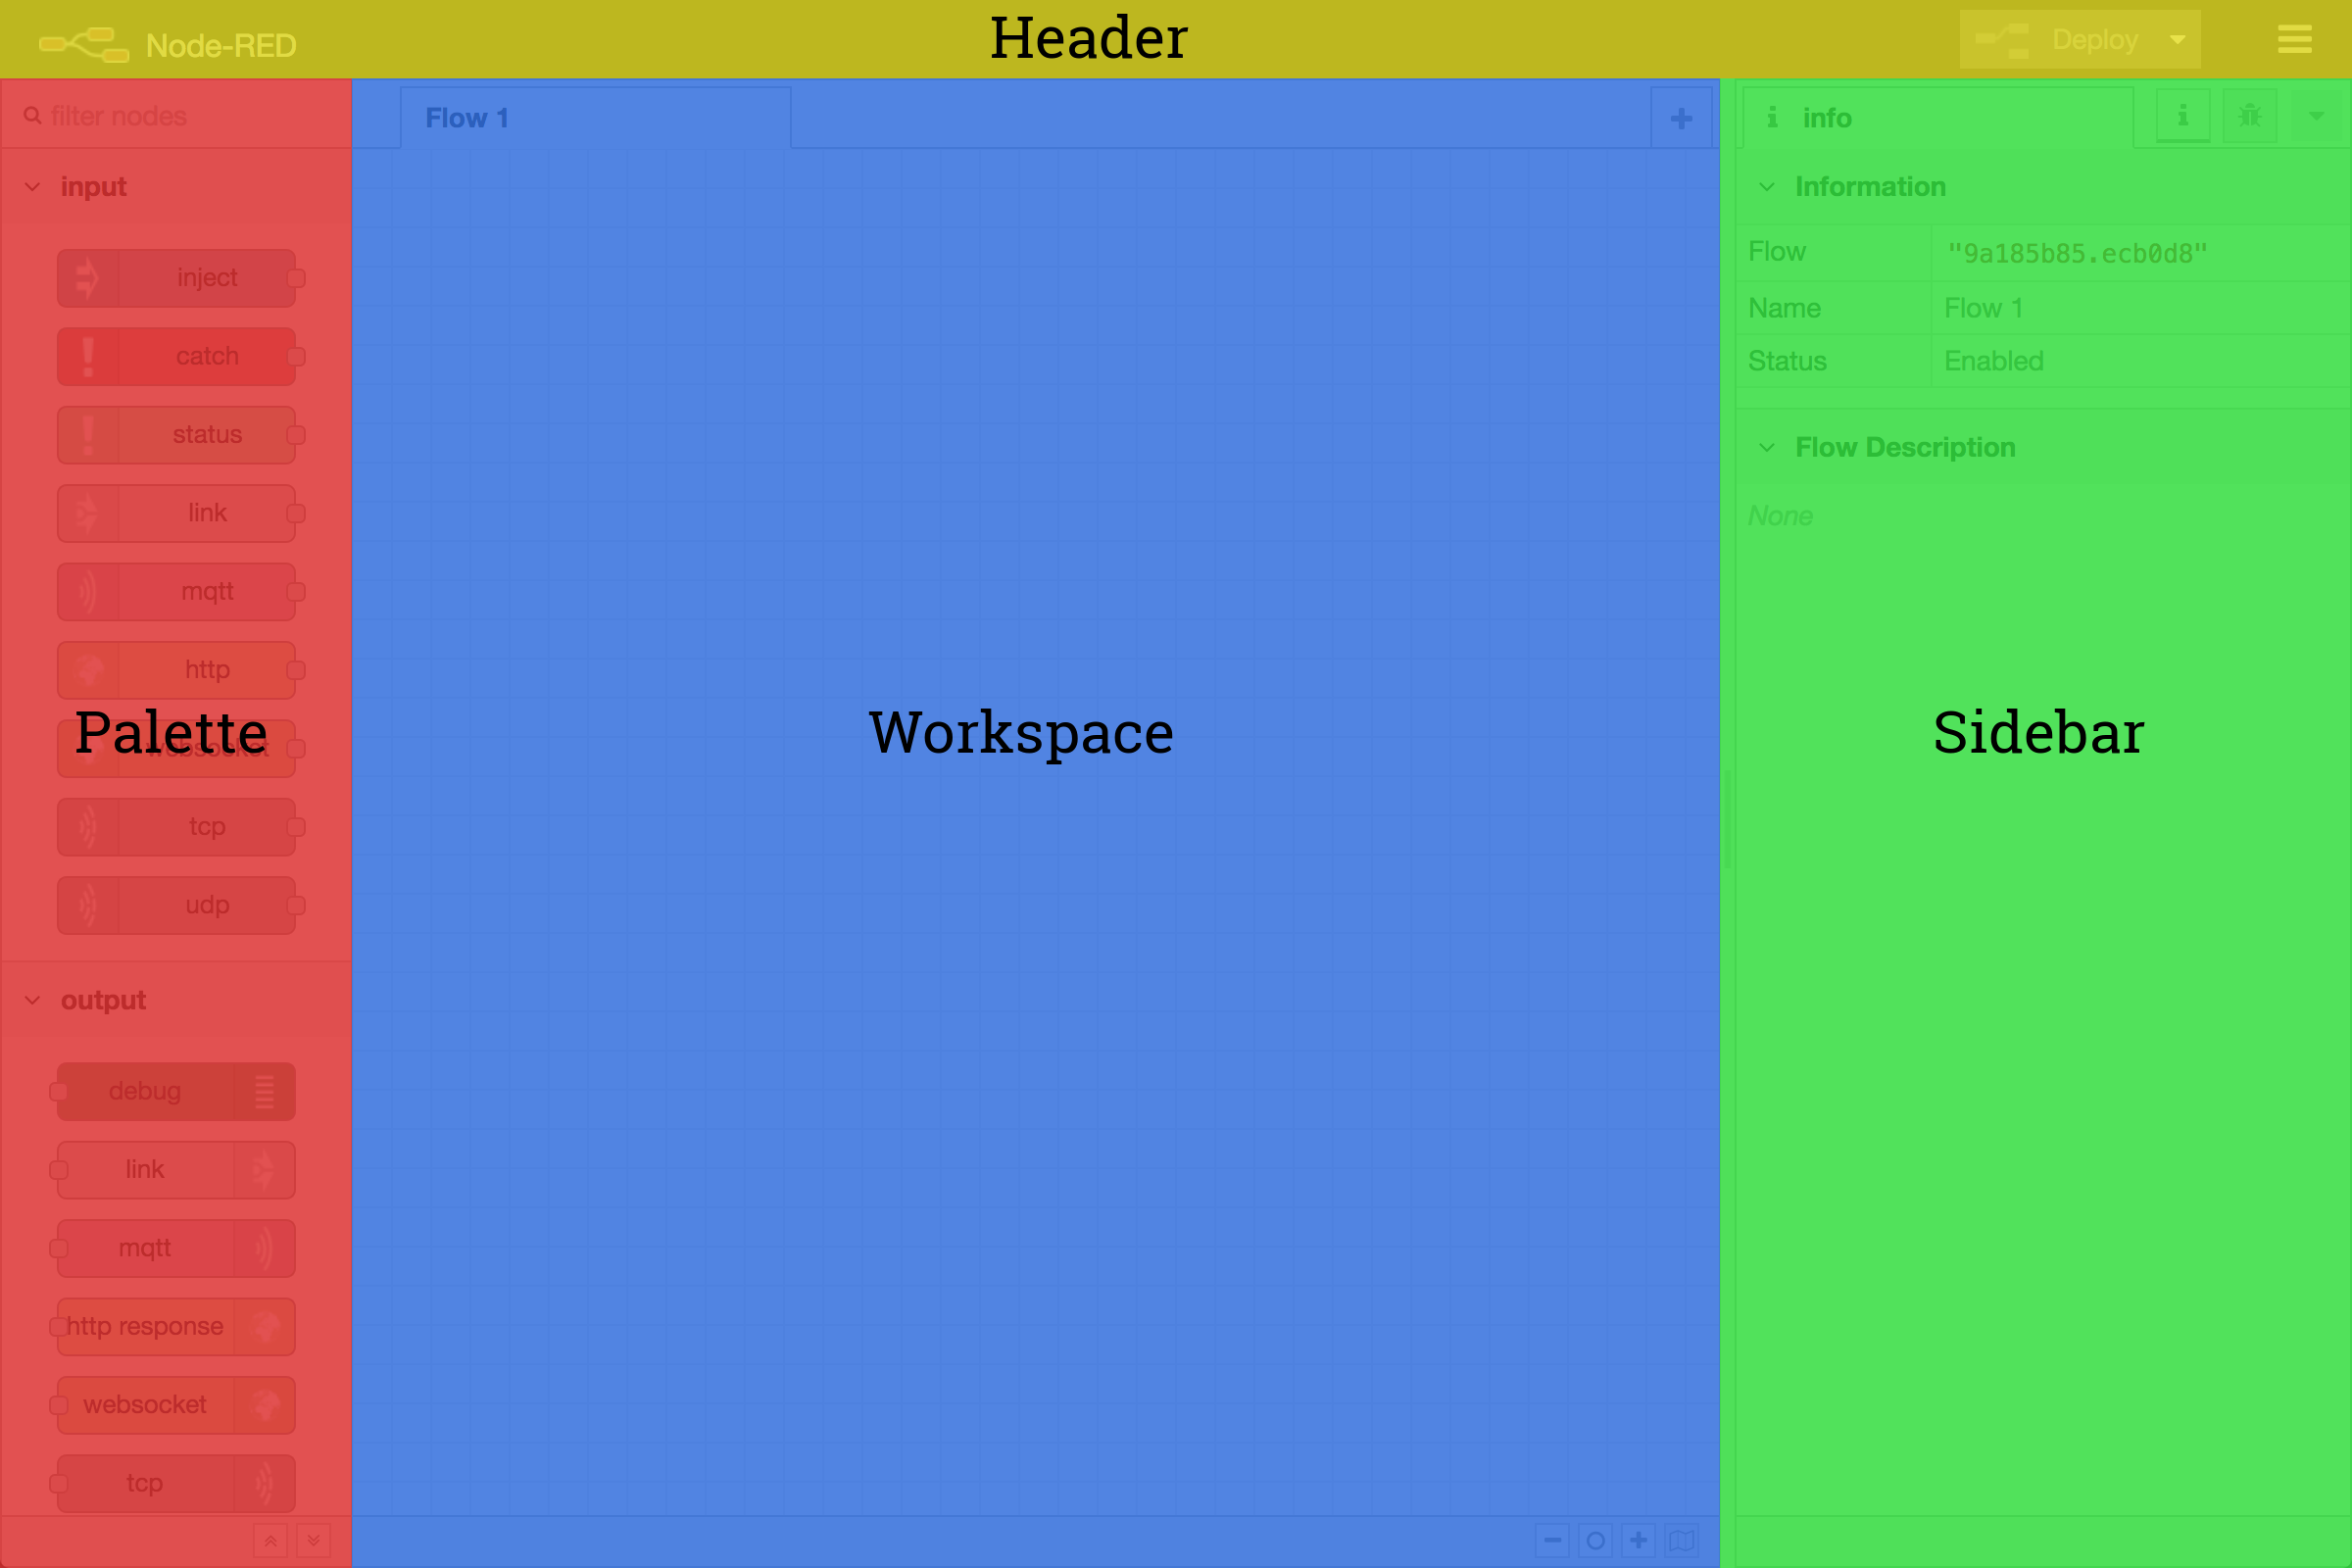
The editor window consists of four components:
- Header: deploy button, main menu & user menu (authentication must be enabled)
- Palette: nodes available for use (manage by the Palate Manager)
- Workspace: where flows are created and wired together
- Sidebar: panels that provide a number of useful tools within the editor (information, debug, configuration nodes & context data)
Nodes used in this project
Inject
The Inject node can be used to manual trigger a flow by clicking the node’s button within the editor. It can also be used to automatically trigger flows at regular intervals.

Debug
The Debug node can be used to display messages in the Debug sidebar within the editor. 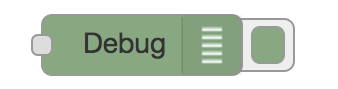
Web Socket in
The web socket in node can be used to listen to a websocket.
Http Request
The Http Request node can be used to make API Request and send/receive JSON data to a website or API.
MQTT Out
The MQTT out node can be used to connect to a MQTT broker. This node will be used for communication with devices inside our ZigBee network.
Function
The Function node allows JavaScript code to be run against the messages that are passed through it. A complete guide for using the Function node is available here.

Change
The Change node can be used to modify a message’s properties and set context properties without having to resort to a Function node.

Switch
The Switch node allows messages to be routed to different branches of a flow by evaluating a set of rules against each message.

Template
The Template node can be used to generate text using a message’s properties to fill out a template.

Joining Rhasspy & Node-RED
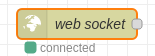
Rhasspy can interact directly with Node-RED directly through websockets. Simply add a websocket input and set the path to ws://<pi's ip>:12101/api/events/intent. Make sure to also set send/receive to entire message.
Your websocket input node will indicate connection status.
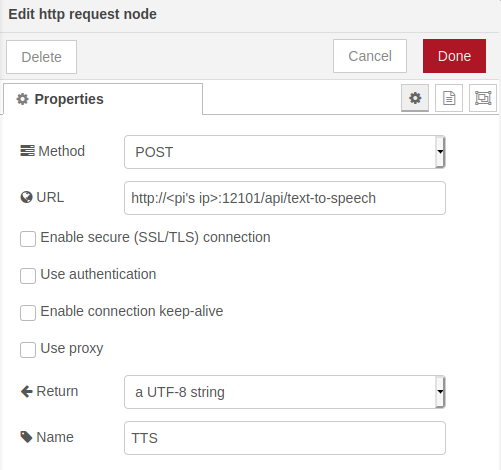
Accessing Rhasspy’s text-to-speech API
Rhasspy’s text to speech API can be accessed using a http request node. Set the http request method to POST and put the address of Rhasspy’s text to speech API <pi's-ip>:12101/api/text-to-speech into the http request node. Forwarded text will now be translated into speech being being spoken from your configured sound device.