Table of contents
Manual software setup
Connecting to Raspberry Pi via SSH
- Open a terminal window and run
ssh pi@ip-address. - Replace
ip-addresswith the one you find in your routers admin panel. - You will be prompted to enter a password - the default password is
raspberry. - Change the default password after login using
sudo passwdcommand.
Terminal output after successful ssh login:

Installation
Follow the steps below to install all necessary components for your offline voice assistant. All commands will be executed inside a terminal window.
Raspberry Pi update
sudo apt-get update
sudo apt-get upgrade -y
sudo timedatectl set-timezone Europe/Berlin
sudo reboot
A list of timezones is available here.
Microphone driver installation
sudo apt install git -y
git clone https://github.com/respeaker/seeed-voicecard.git
cd seeed-voicecard
sudo ./install.sh --compat-kernel
sudo reboot
Application installation
All Applications will be implemented using Docker to ensure improved maintainability and isolation.
Docker Engine
curl -sSL https://get.docker.com | sh
sudo usermod -a -G docker pi
sudo apt-get install docker-compose -y
sudo reboot
Compose is a tool for defining and running multi-container Docker applications. With Compose, you use a YAML file to configure your application’s services.
Rhasspy Service
mkdir rhasspy
cd rhasspy
sudo nano docker-compose.yml # create docker-compose YAML file
Add the following to your YAML file:
rhasspy: # service name
    image: "rhasspy/rhasspy"
    container_name: rhasspy
    restart: unless-stopped
    volumes:
        - "$HOME/rhasspy/.config/rhasspy/profiles:/profiles"
        - "/etc/localtime:/etc/localtime:ro"
    ports:
        - "12101:12101" # webserver
        - "12183:12183" # MQTT server
    devices:
        - "/dev/snd:/dev/snd" # connect mic to docker container
    command: --user-profiles /profiles --profile de
Press CTRL + x followed by y and then hit enter to save all changes.
Start Rhasspy service and grant yourself permission to edit Rhasspy configuration files.
docker-compose up -d
sudo chown -R pi /home/pi/rhasspy
Rhasspy’s web interface should be accessible at ip-address:12101. If something went wrong, remove -d from your docker-compose up command to see the output.
Node-RED
Node-RED is a programming tool for wiring together hardware devices, APIs and online services. Rhasspy is going to interact directly with Node-Red using a WebSocket.
cd /home/pi/
mkdir node-red
cd node-red
mkdir data
nano docker-compose.yml # create docker-compose file using nano
nodered:
    image: "nodered/node-red"
    container_name: nodered
    restart: unless-stopped
    volumes:
        - "/home/pi/node-red/data:/data"
    ports:
        - "1880:1880"
Press CTRL + x followed by y and then hit enter to save all changes.
Start Node-Red service and grant yourself permission to edit Node-Red configuration files.
docker-compose up -d
sudo chown -R pi /home/pi/node-red
Node-RED web interface should be accessible at ip-address:1880. If something went wrong, remove -d from your docker-compose up command to see the output.
ZigBee2MQTT
Allows you to use your Zigbee devices without the vendors bridge or gateway. It bridges events and allows you to control your Zigbee devices via MQTT.
cd /home/pi
mkdir zigbee2mqtt
cd zigbee2mqtt
mkdir data
nano docker-compose.yml # create docker-compose file using nano
  version: '3' # needed to use network_mode
  services:
    zigbee2mqtt:
      container_name: zigbee2mqtt
      image: koenkk/zigbee2mqtt
      volumes:
        - "/home/pi/zigbee2mqtt/data:/app/data"
        - "/run/udev:/run/udev:ro"
      devices:
        - "/dev/ttyACM0:/dev/ttyACM0" # CC2531 ZigBee USB stick
      restart: always
      network_mode: host # connect directly to the Pi's network
      privileged: true
      environment:
        - TZ=Europe/Berlin
Press CTRL + x followed by y and then hit enter to save all changes.
Start Zigbee2MQTT service and grant yourself permission to edit Zigbee2MQTT configuration files.
docker-compose up -d
sudo chown -R pi /home/pi/zigbee2mqtt
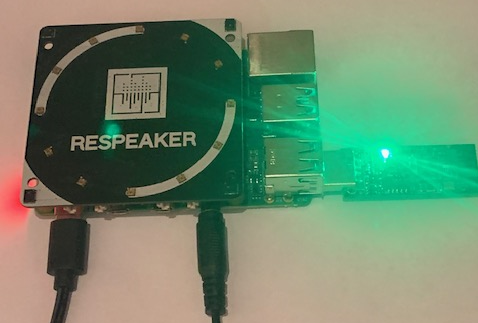
Power LED of your CC2531 ZigBee USB stick will indicate success. If something went wrong, remove -d from your docker-compose up command to see the output.
When Rhasspy is configured, a mosquitto broker is automatically started on port 12183. All of Rhasspy’s services will connect to this private broker and send messages through it. The ZigBee service will also rely on Rhasspy’s mosquitto broker. Connection to this broker will be established by editing Zigbee2MQTT’s configuration file.
cd /home/pi/zigbee2mqtt/data
nano configuration.yaml
homeassistant: false # Home Assistant integration (MQTT discovery)
permit_join: true # Home Assistant integration (MQTT discovery)
mqtt:
  base_topic: zigbee2mqtt # MQTT base topic for zigbee2mqtt MQTT messages
  server: 'mqtt://localhost:12183' # MQTT base topic for zigbee2mqtt MQTT messages
  # MQTT server authentication, uncomment if required:
  # user: my_user
  # password: my_password
serial:
  port: /dev/ttyACM0 # Location of CC2531 USB sniffer
Press CTRL + x followed by y and then hit enter to save all changes.
Set permit_join to false after all devices joined your ZigBee network.
Restart ZigBee2MQTT service.
cd /home/pi/zigbee2mqtt
docker-compose down
docker-compose up -d
Pairing devices
First check if the device page contains instructions on how to pair your device. If no instructions are available, the device can probably be paired by factory resetting it. Aqara LED Light Bulb needs to be turned on and off for 5 times to go into pairing mode. Once you see something similar to below in the log your device is paired.

friendly_name":"0x00158d000520ac5e" will be important in later stages of this guide, when interacting with the device.